While Team Foundation Server 2010 may be primarily known for handling applications, there are extended abilities that will allow you to store other types of mission critical information which is what we’ll be taking a look at.
As with most data-driven applications, the code is something that we safeguard fairly well but sometimes the queries and other database objects are overlooked. I hate speaking from personal experience but how many times have there been attempts to “fix” a stored procedure that ends with disastrous results?
One neat feature that we’ve been exploring is storing queries that we work on into Team Foundation Server 2010 and I’ll be sharing that information with you.
There are some prerequisites involved. Make sure that you have the following available and installed:
• SQL Server Management Studio 2005, 2008 or 2008 R2 (Express versions will not work)
• Team Foundation Server MSSCCI Provider 2010
• Added your user to the collection
• Have an existing Team Project or have created a new Team Project
• Have proper permissions to the project
I’ll be concentrating on getting new SQL scripts through a SQL Server Management Studio project to your Team Foundation Server.
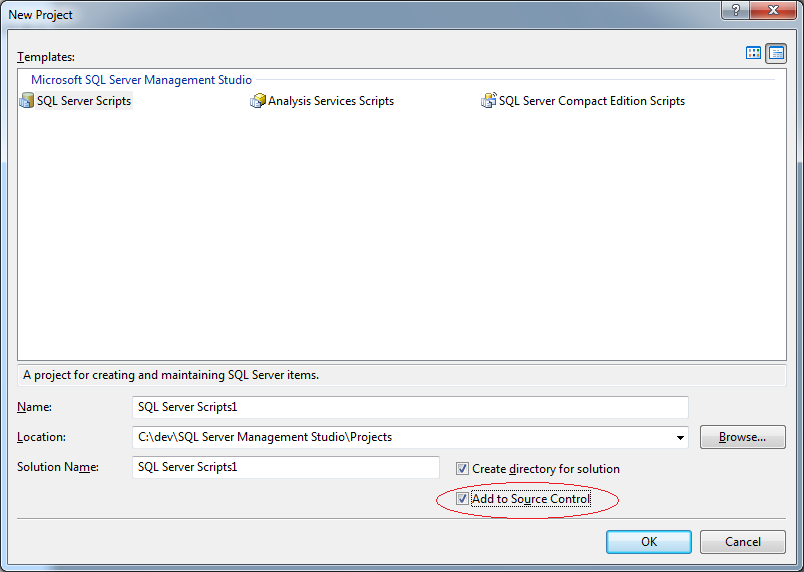
After you’ve installed the Team Foundation Server MSSCCI Provider 2010, open up SQL Server Management Studio and then access, “File”, “New” and then “Project…” to get started. Select the SQL Server Scripts template, provide relevant information for the fields, make sure that you check the “Add to Source Control” option and then click on the “OK” button.
Next, we’ll need to create a connection to our Team Foundation Server. At the “Connect to a Team Foundation Server” window, click on the “Servers…” button and then the “Add..” button. Supply the information for your DiscountASP.NET Team Foundation Server and provide your sign-in credentials when prompted. Click on the “Close” button at the “Add/Remove Team Foundation Server” window which should take you back to the “Connect to a Team Foundation Server” window where you can click the “OK” button.
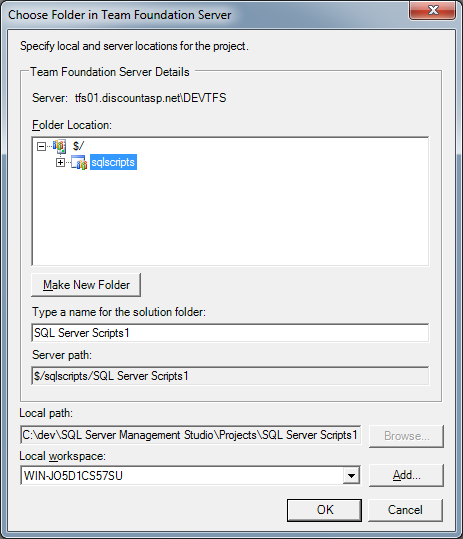
From the “Choose Folder in Team Foundation Server” window, choose your existing project or the new project that you have created and then check in all of the files.
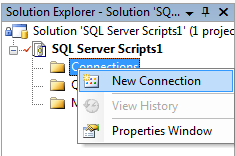
If the “Solution Explorer” isn’t already visible, click on “Solution Explorer” from the “View” menu. Right-click on the “Connections” folder and then click on the “New Connection” item to store the connection information to your database server.
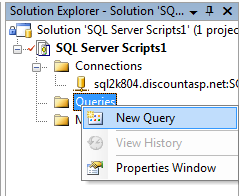
Right-click on the “Queries” folder and then click on the “New Query” option. For test purposes, you can create a simple query such as “select getdate()” and then save it.
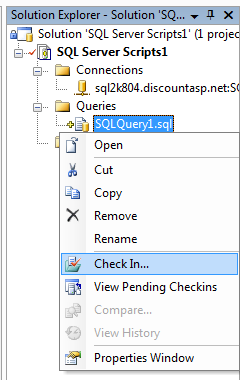
To check the new query in, right-click on the query that you’ve created and then click on the “Check In…” option.
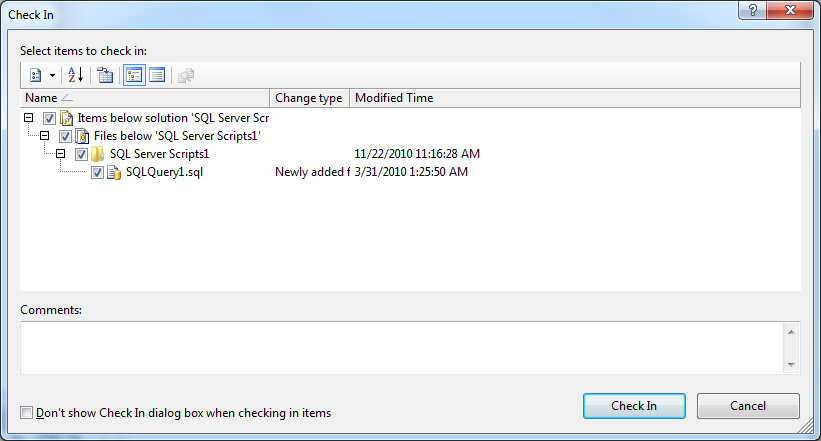
From the “Check In” window, make sure that the new query is selected and then click on the “Check In” button. From the available source files, make sure that your new query is selected and then click on the “Check In” button again.
Your file should now be properly marked as read-only. To make revisions, you can check the file out, apply your changes and then check the file in.
No hay comentarios:
Publicar un comentario